Outlook POP3 จะซิงค์เมลมาเก็บไว้ที่เครื่องคอมฯเป็นไฟล์นามสกุล .pst
– ไฟล์ .pst ควรได้รับการ Backup [ external backup] เสมอเพื่อความปลอดภัยของข้อมูล
– กรณีเปลี่ยนเครื่องคอมฯ จะทำการคัดลอกหรือย้ายไฟล์ .pst ไปไว้ที่เครื่องใหม่ และทำการซิงค์ข้อมูล
วิธีย้ายไฟล์ .pst
เปิดโฟลเดอร์ที่เก็บไฟล์ .pst
ปกติแล้วไฟล์ .pst ของอีเมล pop จะเก็บไว้ที่ C:\Users\<username>\Documents\Outlook Files

คัดลอกไฟล์ .pst ไปไว้ที่คอมฯเครื่องใหม่ แนะนำเก็บไว้ที่โฟลเดอร์ C:\Users\<username>\Documents\Outlook Files
วิธี Browse file .pst
จากคอมฯเครื่องใหม่
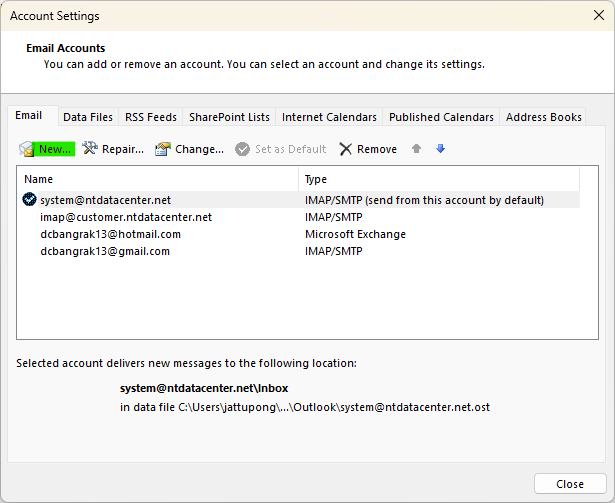
เปิดโปรแกรม Outlook คลิกเลือก File >> Account setting >> Manage profiles >> Email account >> และเลือก New
ติ๊กเลือก Manual setup or additional server types >> กดปุ่ม Next
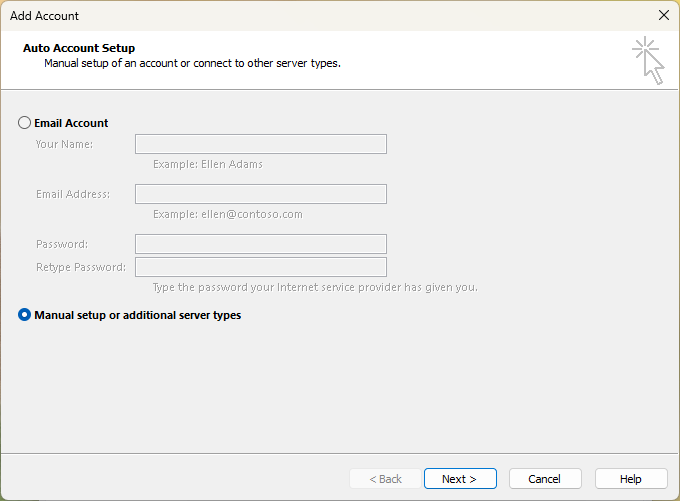
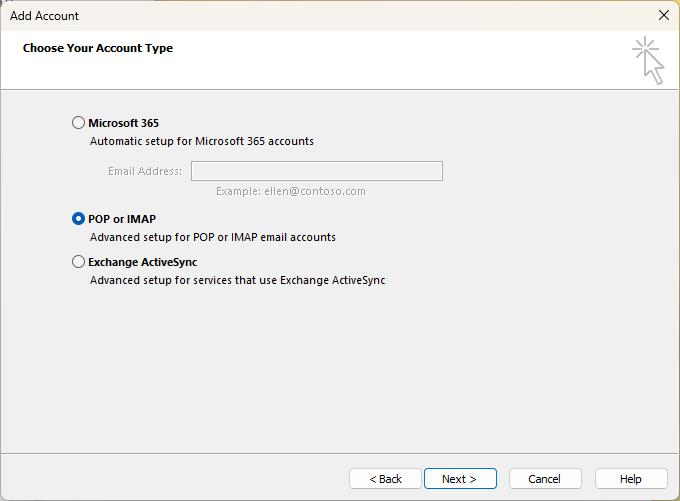
เลือก POP or IMAP >> กดปุ่ม Next
ตั้งค่า ดังนี้
| Type | Meaning | Example |
| You name | ชื่อบัญชีผู้ใช้ | example@abcd.com |
| E-mail address | ชื่อบัญชีผู้ใช้ | example@abcd.com |
| Account Type | POP3 | POP3 |
| Incomming mail server | mail.[โดเมนของลูกค้า] | mail.abcd.com |
| Outgoing mail server | mail.[โดเมนของลูกค้า] | mail.abcd.com |
| User Name | ชื่อบัญชีผู้ใช้ | example@abcd.com |
| Password | รหัสผ่าน | ******** |
จากหัวข้อ Deliver new messages to ให้เลือก Existing Outlook Data File (ไฟล์ข้อมูล Outlook ที่มีอยู่) แล้วคลิกปุ่ม Browse (เรียกดู)
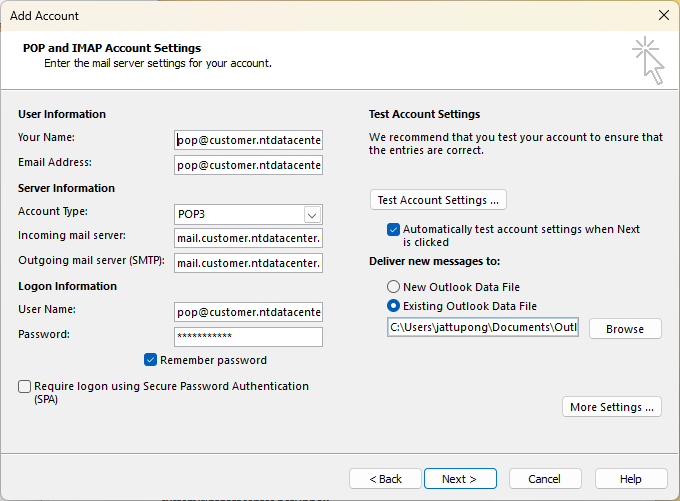
เลือกไฟล์ .pst ตามที่ได้คัดลอกไฟล์มาจากเครื่องเก่า แล้วคลิกปุ่ม OK

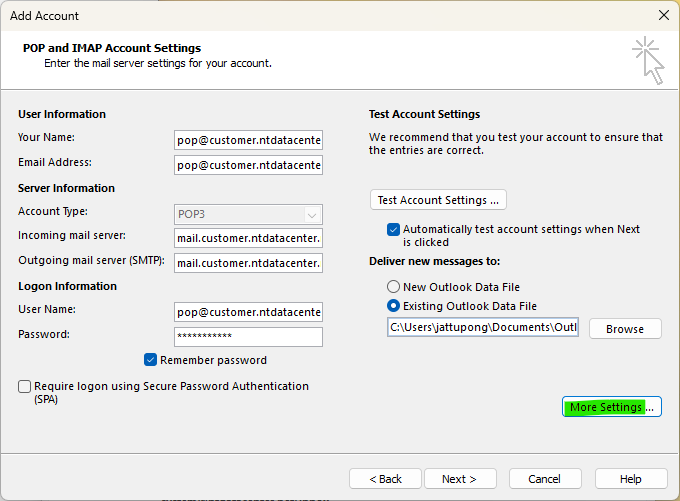
คลิกปุ่ม More settings
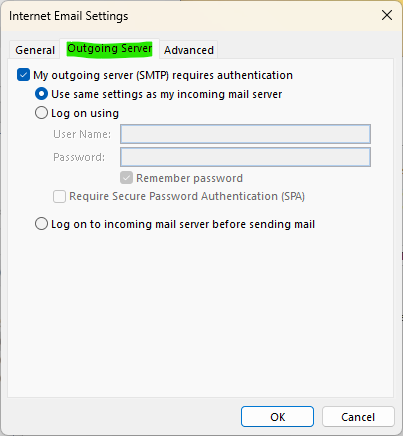
Tab bar “Outgoing server“
ติ๊กเลือก “My outgoing server (SMTP) requires authentication“
“use same settings as my incoming mail server“
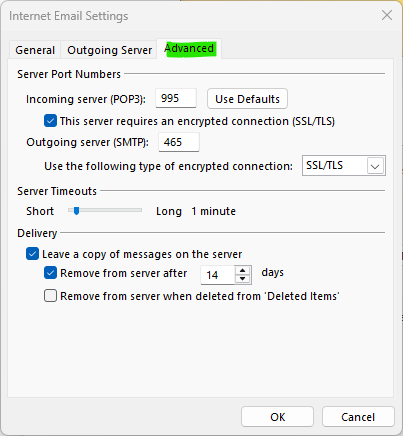
Tab bar “Advance” ตั้งค่า ดังนี้
| Incoming server (POP): | 995 |
| Use the following type of encrypted connection: | SSL/TLS |
| Outgoing server (SMTP): | 465 |
| Use the following type of encrypted connection: | SSL/TLS |
เรียบร้อยแล้วกดปุ่ม OK >> กดปุ่ม Next ตามลำดับ
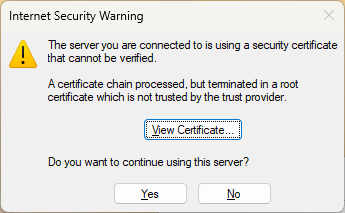
วิธีการยืนยัน certificate ให้กับ Microsoft Outlook คลิก
หน้าต่าง Test Account จะต้องแสดงผล Completed ทั้งสอง >> กดปุ่ม Close >> Finish เพื่อเสร็จสิ้น
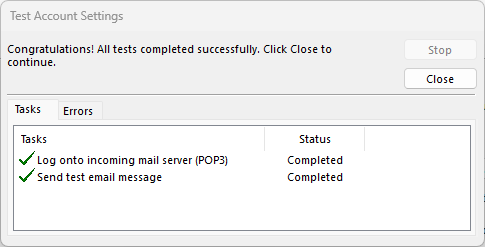
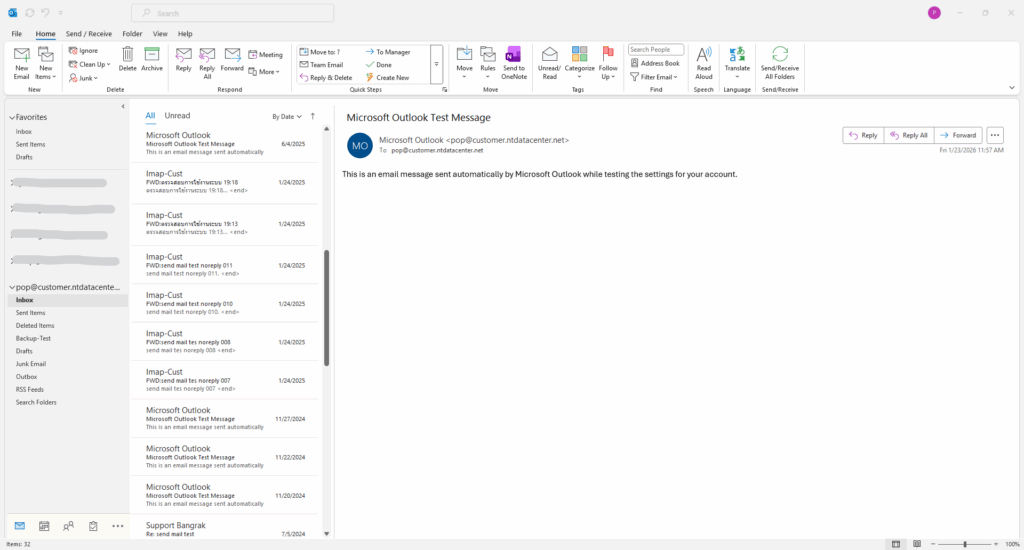
หากถูกต้องสมบูรณ์ ข้อมูลเมลเดิมที่มีอยู่ในไฟล์ .pst จะแสดงผลในหน้าแรกของ Outlook